Writing your first macro
A macro can be used to add functionality to your application. It is typically assigned to an event-related property of an object. When the object's event is triggered, the macro will be executed. Macros can also be configured so that they appear in the Newlook Smartclient menu or can be run via a shortcut key combination.
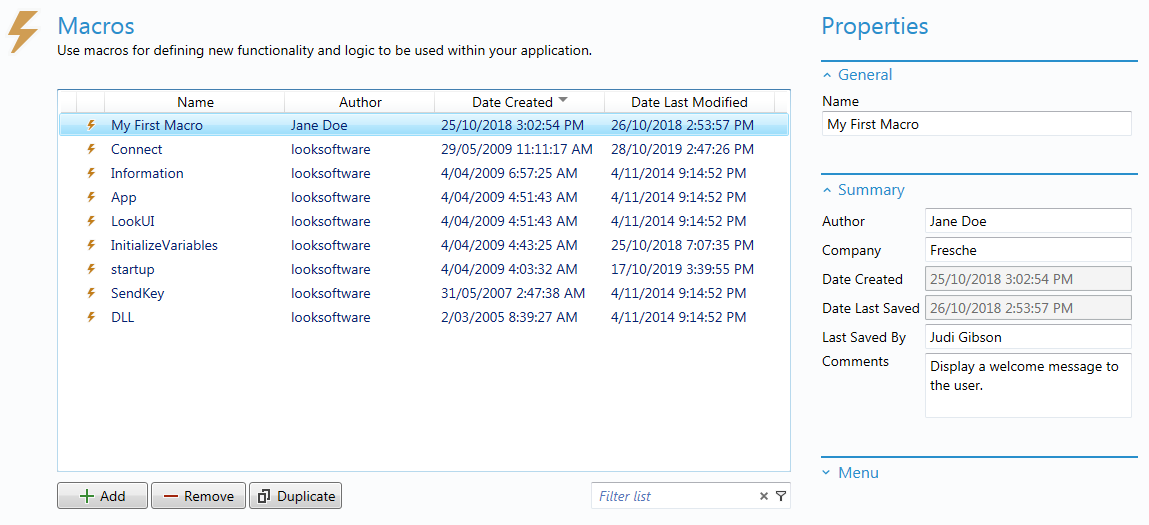
Once a macro is created it will appear in the Macro Collection window (select Logic  > Macros from the Developer Bar). This window lists all the macros stored in the current solution's shared repository (.sid file) and allows you to sort, filter, duplicate, delete and add new macros. You can sort macros by clicking the relevant column header or filter the list to only those macros containing the specified filter string. Double clicking a macro in this window will open it in the editor.
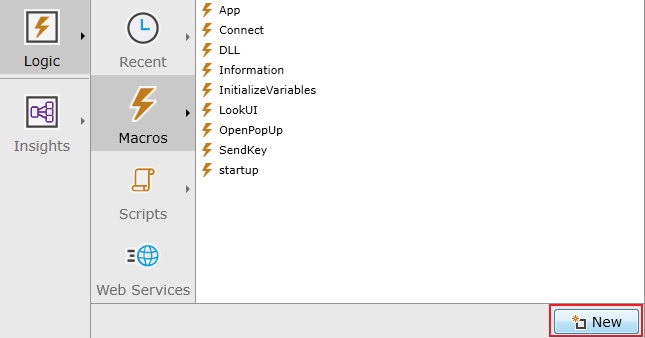
1. Select Logic
( ) > Macros > New
from
the developer bar.
) > Macros > New
from
the developer bar.
2. Enter a Name for your macro.

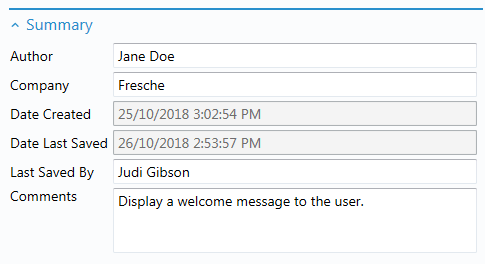
3. (Optional) Enter Comments in the Summary section, to record the purpose of the macro. This is useful if you are working in a multiple developer environment.
4. In the Action column, either click the drop down to select the action you wish to execute or, if you already know the name of the action, you can start typing and Newlook will auto-fill the cell with any action that matches the letters you have typed.

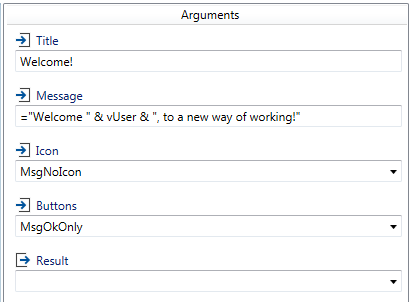
5. Enter any relevant Arguments for the current action. Most Newlook actions have arguments. Mandatory arguments will appear outlined in red. Refer to the Newlook reference guide in help for information on all Newlook actions and their respective arguments.
6. If you only want the specified action to run when a certain condition is met, enter an expression in the Condition column. Refer to the Macro Conditions topic for more information.

7. To add more actions you your macro, move to the next row and repeat these steps.

8. Add a comment in your macro to explain what is going on by clicking the Comment Row ( ) button.

9. When complete, click the Save button ( ) to save your macro and test your macro by clicking Debug > Run "<macro>" (
 ) from the main menu.
TIP:
To copy and paste an entire row in a macro, position your cursor in the row number column and click on the row that you want to copy. Do the same thing when you are pasting. This will select the entire row, whereas positioning your cursor in the Label, Condition or Action column will select just the contents of that cell. Use Shift+click or Ctrl+click to select multiple rows.
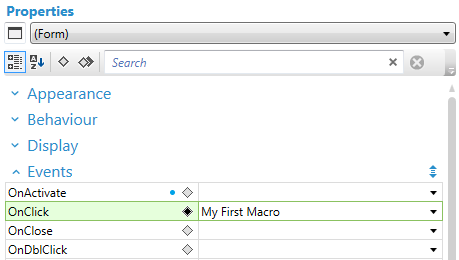
All of the objects in the Newlook object model have special event-related properties. These properties begin with the prefix On. For example, the form object has various event-related properties, including OnClick, OnReceive, OnSend and more. These properties allow you to run a macro or script when this event is triggered at runtime. You might wish to run a macro called Display DateTime, which would open a pop-up window containing the current date and time, when the user clicks on a specific form. To do this you would need to create the macro in the Macro Editor and then set the OnClick property to this macro on the relevant form. Each time the user clicks this form, the Display DateTime macro will run.
It is possible to configure a macro so that it will be added to the Newlook Smartclient Macros menu. This gives your end users the ability to access the macro at any time, which can be useful if the functionality is not tied to a specific screen or control.
Make sure that the Macro's properties panel is visible, and that the Menu section is expanded. To display the macro in the Newlook Smartclient menu tick the option Show in the menu for: Smartclient users. You can also set the following optional items:
Menu Group
Groups enable you to categorize and organize
macros into individual Menus and Sub-menus. When saving macros, you can
specify a menu group name to have them inserted under. You can nest menu
groups by delimiting them with a semi-colon character (;). For example General;Utilities
will show the saved macro in the Generalmenu, under the
Utilities submenu.
Menu Icon
Specify an icon to be used for the macro in the macro menu.
You can assign a keyboard shortcut to a macro so that it can be run at anytime by your end users.
Make sure that the Macro's properties panel is visible, and that the Menu section is expanded. To assign a keyboard shortcut for the macro, click
the record
button ( ) and then press a key or key combination to use
as the keyboard shortcut to invoke the macro at runtime. The keys pressed
are automatically entered in the Key field.
) and then press a key or key combination to use
as the keyboard shortcut to invoke the macro at runtime. The keys pressed
are automatically entered in the Key field.
There are two ways to delete a macro.
1. Open the macro you wish to delete and select File > Delete '<macro name>''.
2. Open the Macro Collection Editor, select the macro you want to delete and click the Delete button.
Use the Find ( ) and Replace (
 ) tools to search for text or number strings within your current macros. The Macro
Find & Replace tool can be enabled from the Edit option on the main menu.
) tools to search for text or number strings within your current macros. The Macro
Find & Replace tool can be enabled from the Edit option on the main menu.

Enter the string you want to search for in the Find text field. Enter the string you want to replace the found text with in the Replace with field. If you would like the tool to match only those strings with the same capitalization as the entered find text, then select the Match case option.
The Find All ( ) tool allows you to search the current repository (.sid file) for the specified string. You can elect to search for the string in all Forms, Macros and Scripts or both. When searching forms, the tool will only match property names or values that have been explicitly set by the user.
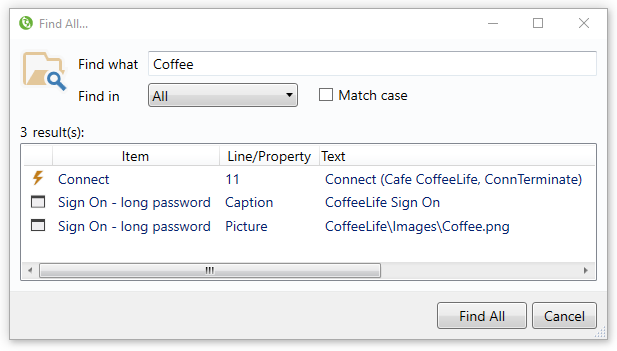
- Enter the string you wish to search for in the Find what field.
- Select where you want to search for the string, by setting Find in to either All, Forms or Macros/Scripts.
- If you would like the tool to match only those strings with the same capitalization as the entered find text, then select the Match case option.
- Double-click on any returned item to open the relevant form, macro or script in the editor.
The returned results will list any forms, macro or scripts containing the search string, and the line or property that the string was found in.
See Also
Macro Conditions | Properties and Events | Variables, Arrays and Types | Expressions | Startup Macro | Writing and Debugging Macros | Scripts | Reference